
Lately, I’ve been inhaling a little too much flux fumes so I decided that I needed a fume extractor. I saw a lot of DIY fume extractors on the web but I wasn’t satisfied with the performance of those extractors. A lot of the demonstrations showed that you had to be within 2 inches of the fan in order for it to work properly.
My dad happened to have an Attwood Turbo 4000 blower in his shop, and it seemed perfect for this type of task. It already has the housing for the fan and plenty of room for a filter, switch, and power.
Parts
1x Attwood Turbo 4000 blower (or any other similar 12v blower)
1x AC to DC adapter. 12v 3A+. I actually used a 12v 800mA adapter and it seemed to work even though the motor is rated at 3.8A, but the adapter gets pretty hot.
- 1x DC jack. I used the panel mount type. You can optionally just cut the wire and hook it up to the switch directly.
1x SPST switch. You can optionally just plug the DC adapter directly to the motor.
Cutaway carbon filter. I used Black Magic Cut-Your-Own Filter. I bought mine from Pet-Supermarket, but I think Wal-Mart sells them.
Scotch tape (or a better method of attaching the filter)
Assembly
This should really be self explanatory, but below are the steps you can take to assemble the fume extractor.
Connect the DC and the motor to the switch. Don’t solder anything yet and make sure it all works. I used some shrink wrap to prevent the wires from touching each other.
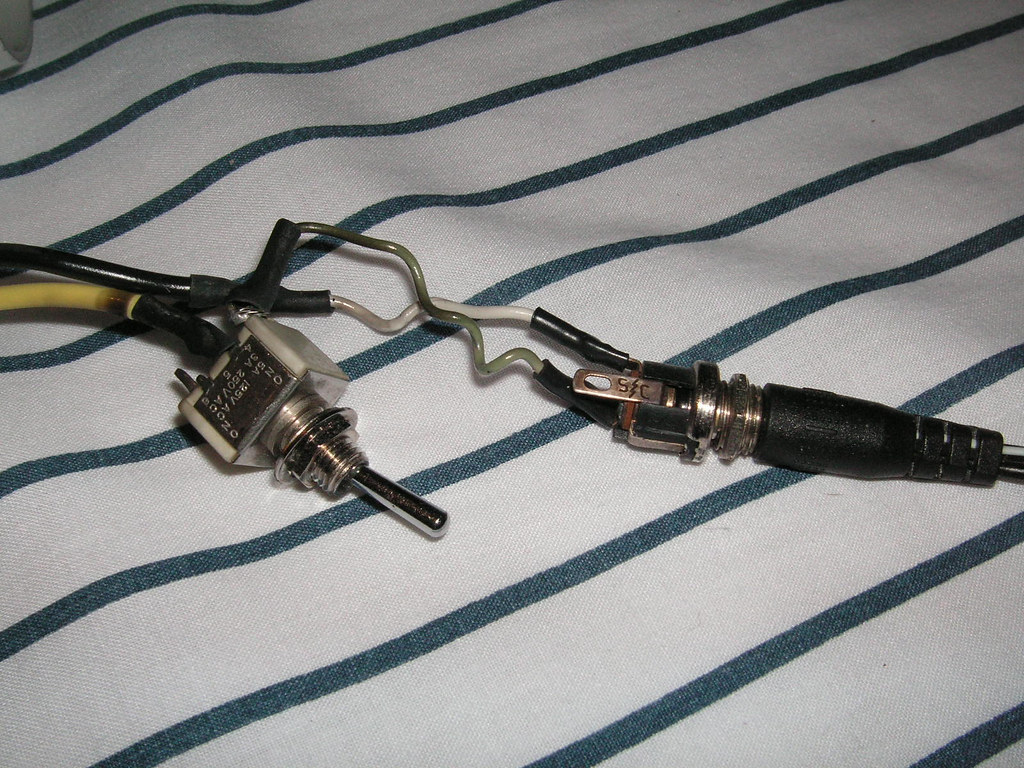
DC, switch, motor, wires
Time to cut out of filter. One trick you can do is to press the blower hard onto the filter to make an indent. Then use an x-acto knife to cut the filter out as a circle pattern that will insert nicely into the case. Note that the fan of the blower is very close to the edge of the case, and the filter will touch the center of the fan. I didn’t notice the fan running slower as a result of rubbing on the filter. I used scotch tape to hold the filter in. There are better ways to keep the filter in, but this was cheap and easy.
You can see in the picture that the flux fumes have stuck to the carbon filter.
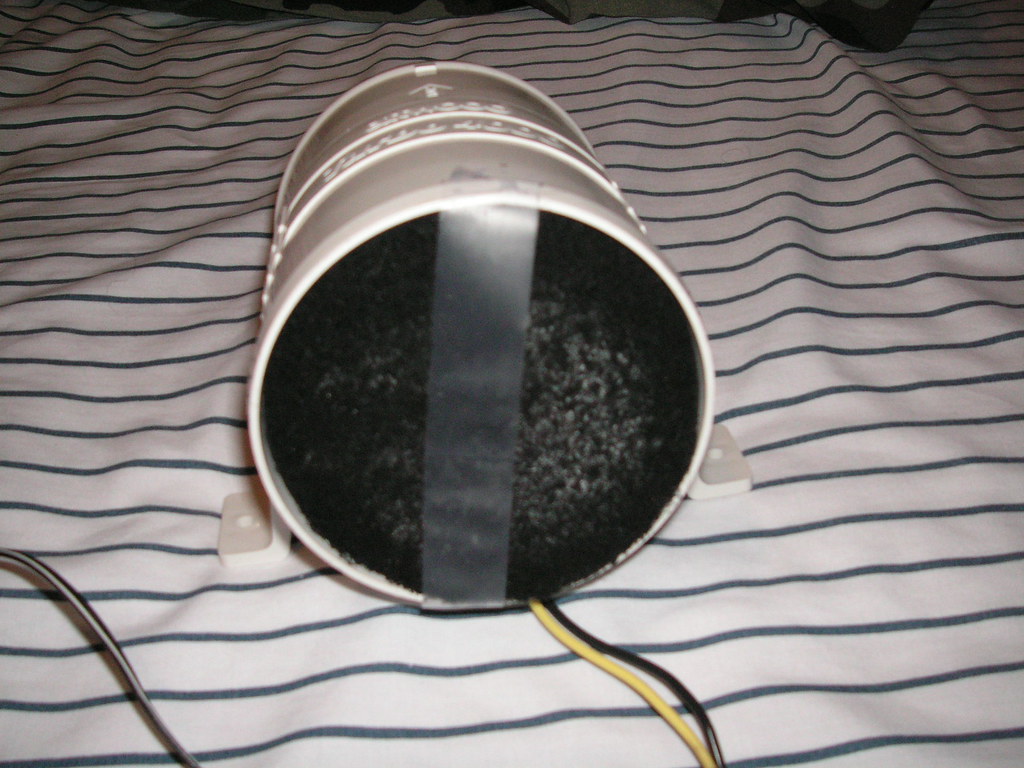
Showing how the filter is installed. Scotch tape!
Here is a picture of the specifications of my particular blower.
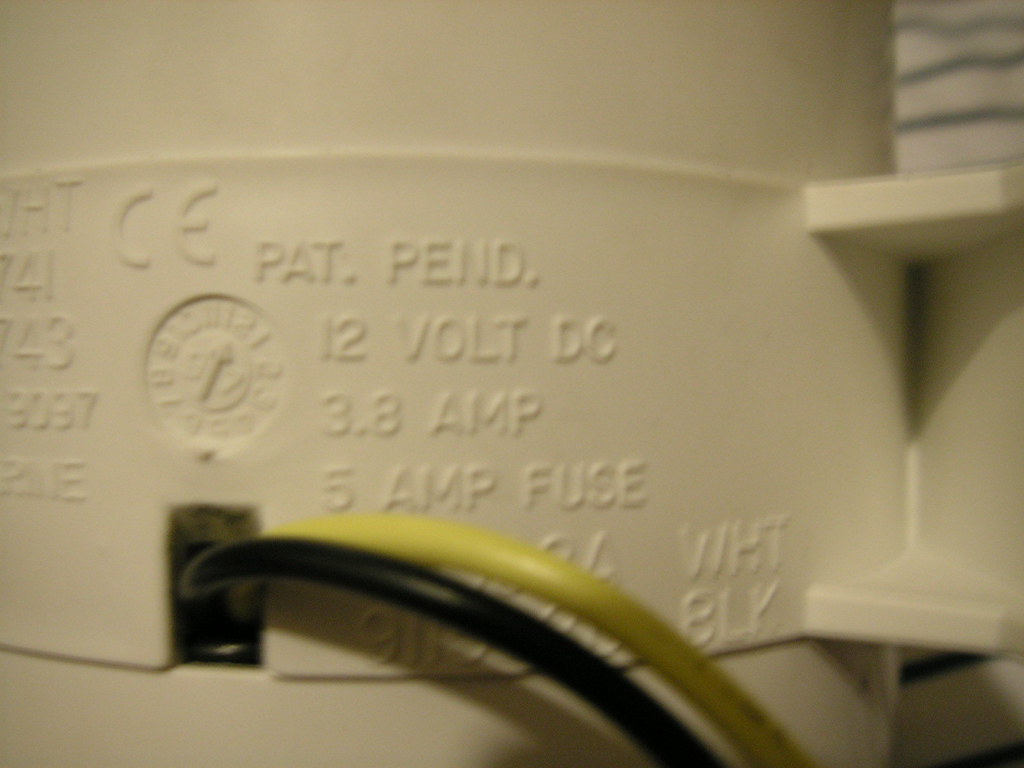
Blower specifications
Here is the fume extractor’s switch and DC parts hot glued to the bottom of the blower.
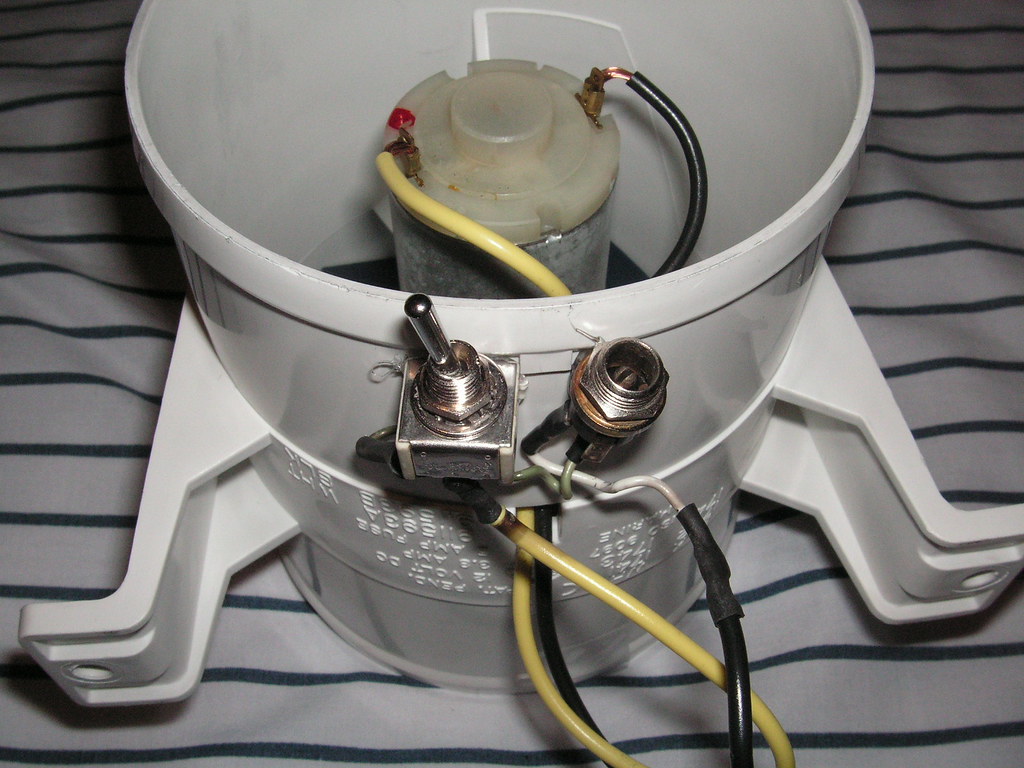
Hot glued switch and DC jack
The switch location would most likely be more accessible if it was pointing towards the front or was on top.
Thoughts
If you don’t want wires coming out of the fume extractor, you can experiment with batteries. Something like a laptop battery should work.
You could install the filter on the other side and reverse the polarity of the DC. This would give you more room to install the filter and attach it properly. Just make sure that you make the fumes get sucked through the filter first before it hits the fan as the fumes are corrosive (though, the degree of which is probably ignorable).
I suggest you put some kind of rubber or silicon on the feet. This thing is powerful enough to make it move around!
Conclusion
This thing really rocks. I can solder about 8 inches away and it’ll suck it up. It could probably perform much better if the filter was thinner, or I had a DC adapter with a higher current rating. The total cost of this project will most likely run you about $30-$45. Still cheaper than a lot of the commercial fume extractors out there (not to mention the power).
Load Comments