I decided this year to make a 8x8 RGB LED device to give to my girlfriend for Valentine’s Day. I had made her a heart of red LEDs two years ago and I decided to step it up a little. No, this was not a cheap solution (it cost around $100 in materials, including all the stuff I bought that I ended up not using). I spent more time on this thing than anything I have made before.
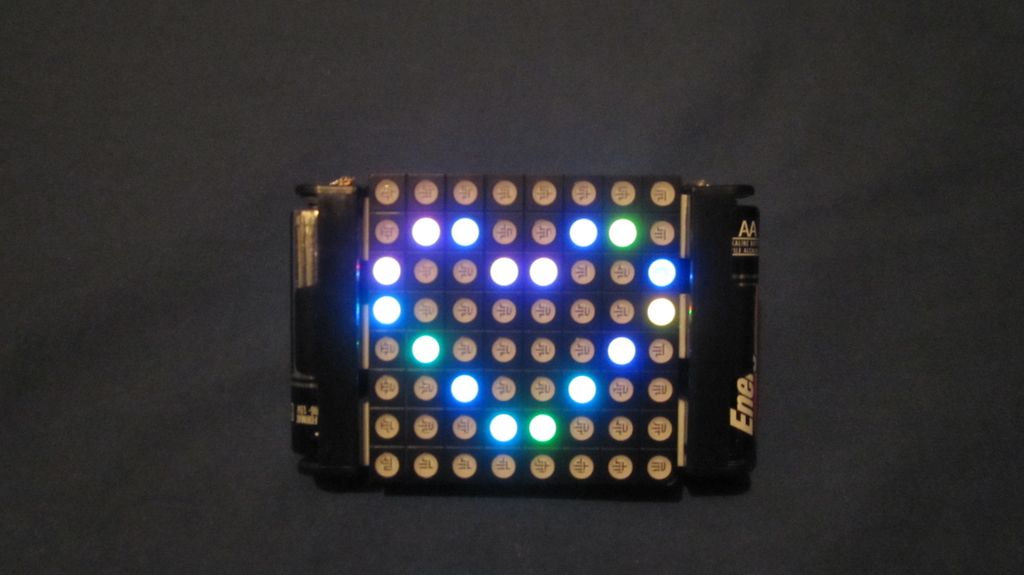
I knew what I wanted to make, but wasn’t sure what I was going to do to make it. Initially I was thinking I would buy the 8x8 RGB LED from Seeedstudio and then build my own LED driver board to run it. After some research, it seemed that this would take a much longer time than I had to complete this. Some extensive google searching yielded the 64-pixel RGB LED matrix kit from the 2uF blog. The creator of the kit was very prompt in sending me the device and it wasn’t long before I soldered everything together and had it running.
I spent several weeks slowly programming the animations into the device. I sort of knew what I was doing but I had never done any animations before. The most difficult part was optimizing parts of the code to prevent flickering. Also, I ran into RAM limit problems since the kit is based on the atmega168 and not the atmega328p.
After I had programmed the basic animations, now comes the task on how to power this thing. I could either go the cheap/easy way of just getting a wall adapter and hooking it up to the device, or I could make it cooler by making it battery powered and portable.
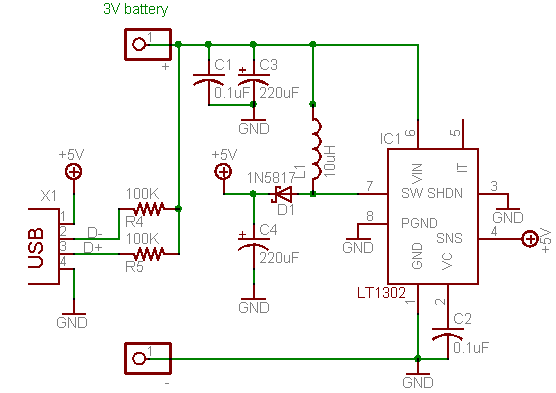
The circuit I chose to use was the one based on the Minty Boost from adafruit. There are plenty of circuits out there involving the LT1302 that I could use, but I figured if it’s good enough to be charging iphones, ipods, etc.. it’d be good enough to run my device. The only thing I cut out of that design were the 100K charging resistors. I also used a 22uH inductor as recommended by the design process.

Back of device
Originally I was going to make the step-up converter be on a board that covered the whole back of the device, then put the batteries on the board with it, but then I would have to add extra buttons as it would cover the buttons already on the board. The decision to put the batteries on the side came about because they would not fit on the back properly. It just looked weird. What I did here had a nice side-effect of giving it handles to hold on like a hand-held game.

Step-up converter board
I had to use some hot glue on the headers and the switch to keep them from moving.

Bottom of step-up converter
Was it worth it? It sure was. My girl appreciates this a lot more than if I were to buy her jewelry (she has enough of it anyway).

Red heart
Source code
The code is a bit of a mess and uncommented for the most part.
Load Comments